
Heavenly Cool Whip Candy
Rain had been falling since early morning, drumming on the windows like an old metronome. My niece Mia was curled up in a fleece blanket, flipping through a picture book, while my brother-in-law rummaged around my kitchen muttering something about needing “just one bite of something chocolate.”
We’d just wrapped up our annual fall cleaning weekend something of a family tradition involving way too many cardboard boxes and arguments over which mugs are “sentimental.” With the air crisp and the house full of chatter, I decided it was the perfect time to test something new for dessert: Cool Whip Candy.
I’d seen variations floating around recipe groups for weeks some called it mousse candy, others chocolate pillows but I was drawn to the simplicity and playfulness of the name. As someone who usually leans toward rustic bakes and yeasty doughs, this recipe felt like a fun detour.
My neighbor Sharon, who drops in whenever she smells cocoa in the air, arrived just in time to help me dip the chilled bars. Her 5-year-old brought a step stool and taste-tested the glaze straight from the bowl. No one minded the sticky fingers or smudges. The kitchen was noisy, but that was part of the joy.
That afternoon, we ended up with a tray of glossy little triangles that cracked just slightly on the outside, hiding a soft, fluffy middle. We stored them in the freezer, and every time someone opened the fridge door, I’d hear the rustle of parchment and a not-so-stealthy “Just one more…” These Cool Whip Candies didn’t just cool us down they made the day sweeter in all the right ways.
Short Description
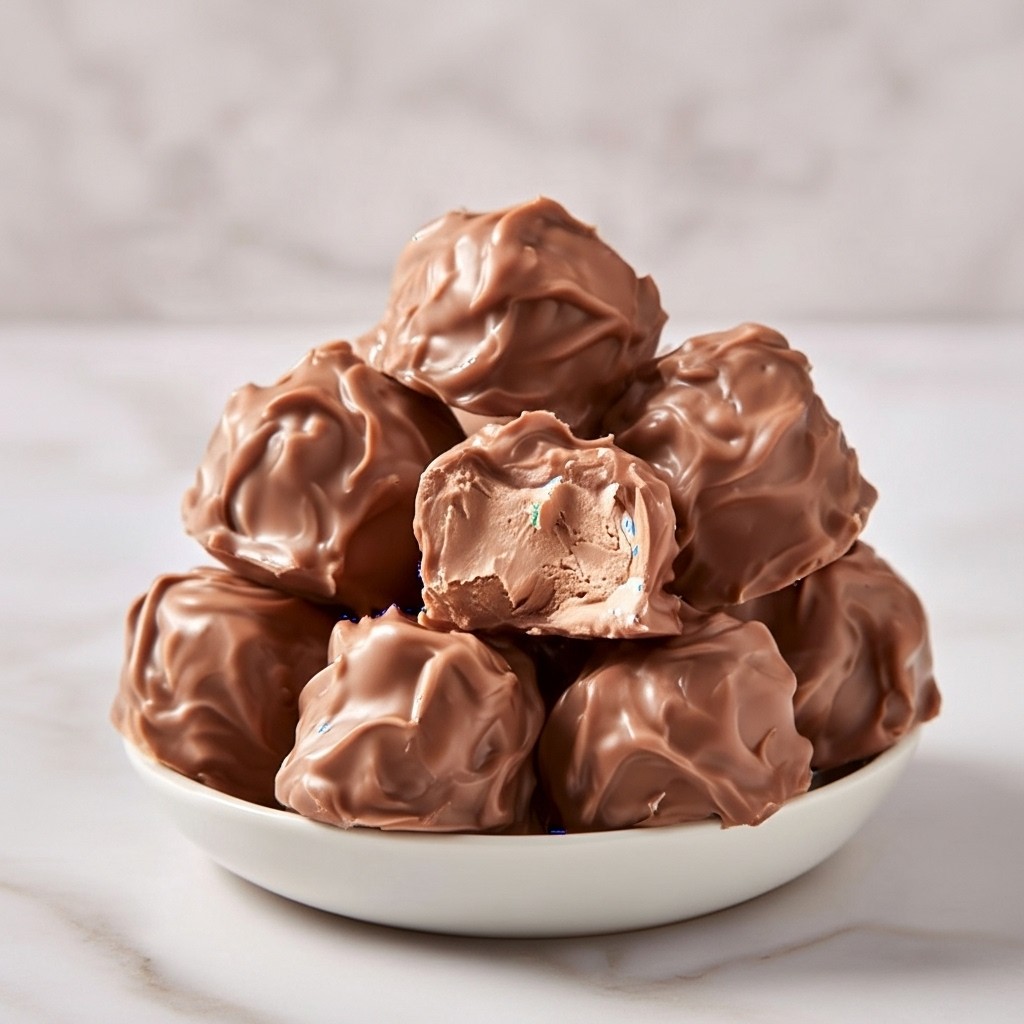
Cool Whip Candy is a frozen, mousse-like chocolate treat dipped in a crisp chocolate shell. It’s simple, creamy, and delightfully fun to make perfect for both casual nibbling and gifting.
Key Ingredients
- 8 oz Cool Whip, thawed
- 24 oz (about 6 cups) milk chocolate chips
- 1½ tbsp vegetable shortening
Tools Needed
- 8-inch square pan
- Parchment paper
- Microwave-safe bowl
- Spatula
- Sharp knife
- Baking tray
- Freezer
Cooking Instructions
Step 1: Prepare the Base
Line an 8-inch square pan with parchment, allowing excess paper to hang over the sides. Melt 14 oz of chocolate chips in 30-second intervals in a microwave-safe bowl, stirring between each session until smooth.
Step 2: Mix with Cool Whip
Let the melted chocolate cool slightly (not hot, but still fluid). Gently fold in the thawed Cool Whip until the mixture becomes fluffy and mousse-like. Spread the mixture evenly in the lined pan. Freeze for 1 hour until firm.
Step 3: Slice and Freeze Again
Once firm, lift the chilled block using the parchment. Cut into 16 squares, then slice each square diagonally to create 32 triangle-shaped bars. Return the pieces to the freezer for 2 more hours, or until solid.
Step 4: Coat with Chocolate
Melt the remaining 10 oz of chocolate chips with the vegetable shortening until glossy and smooth. Dip each frozen bar quickly into the melted chocolate, let excess drip off, and place them on a clean sheet of parchment. Freeze again for 2 hours or until the coating hardens completely.
Step 5: Serve Chilled
Serve straight from the freezer for the best texture—crispy shell outside, creamy chocolate center inside.
Why You’ll Love This Recipe
Quick and minimal ingredients
No baking required
Freezer-friendly and make-ahead
Kid-approved and great for parties
Creamy inside, crisp outside contrast
Ideal for hot days or gifting
Mistakes to Avoid & Solutions
Overheating the Chocolate
Chocolate becomes grainy or burns.
Solution: Use 30-second microwave intervals and stir well each time. Stop as soon as it’s smooth.
Mixing Cool Whip into Hot Chocolate
Causes melting and separation.
Solution: Let chocolate cool for 5–7 minutes before folding in Cool Whip.
Skipping the Freeze Between Steps
Bars lose shape during dipping.
Solution: Freeze until completely solid before dipping into the warm coating.
Chocolate Coating Too Thick
Makes the bars overly sweet and hard to bite.
Solution: Let excess chocolate drip off fully before placing on parchment.
Cutting Before Fully Frozen
Bars get mushy or stick to the knife.
Solution: Always freeze the mixture for at least 1 hour before slicing.
Serving and Pairing Suggestions
Serve as a frozen dessert bite at parties
Pair with fresh strawberries or raspberries
Great with coffee or iced espresso
Wrap individually and serve on a dessert platter
Serve buffet-style from a chilled tray
Storage and Reheating Tips
Store in airtight containers, layered with parchment
Keep in the freezer for up to 3 weeks
Do not refrigerate or leave at room temperature softens too much
No reheating needed serve straight from freezer
FAQs
1. Can I use dark chocolate instead of milk chocolate?
Yes, but it will make the bars slightly less sweet and more intense in flavor. Choose high-quality dark chocolate for the best melt.
2. Can I make this dairy-free?
You can try dairy-free whipped topping and vegan chocolate chips, though texture may differ slightly.
3. Is there a way to add flavor to the filling?
Absolutely. Mix in a teaspoon of instant espresso or peppermint extract with the Cool Whip for a twist.
4. Can I shape them into balls instead of triangles?
Yes. Scoop and roll the mousse mixture into balls before freezing. Then dip in chocolate.
5. Do they need to be kept frozen when serving?
Yes, or they’ll become too soft. Keep them chilled until serving and return extras to the freezer.
Tips & Tricks
Use silicone spatulas for smooth folding without deflating the mousse
Pre-cut parchment helps remove the bars cleanly
Double the batch and store half for last-minute guests
For cleaner dipping, use a fork and tap gently on the side of the bowl
Let dipped bars set in the freezer on a chilled baking tray to prevent melting
Recipe Variations
Peanut Butter Cool Whip Candy
Replace 2 oz of chocolate chips in the base with 2 tbsp creamy peanut butter. Fold into the Cool Whip mixture for a nutty flavor before freezing and slicing.
Mint Chocolate Cool Whip Candy
Add ¼ tsp peppermint extract when mixing chocolate with Cool Whip. Optionally, use green food coloring and top the bars with crushed mint candies after dipping.
Cookies and Cream Version
Crush 6 Oreo cookies and fold them into the Cool Whip before combining with chocolate. Adds a crunchy surprise to every bite.
White Chocolate Raspberry
Use white chocolate chips instead of milk. Fold in 2 tbsp freeze-dried raspberries for a tart contrast to the creamy center.
Final Thoughts
In the hum of a house filled with footsteps and fridge doors swinging open, Cool Whip Candy quickly became more than just a sweet bite it turned into an edible pause. Something about the chill on your fingers and the creamy crunch makes you slow down, if only for a moment. And when the room is buzzing with family asking for seconds, you know something went right.
We made these candies on a day full of to-do lists and furniture rearranging, but they ended up stealing the spotlight. I’ll always remember how simple it was just chocolate, whipped topping, and a few hours of patience. But in that simplicity lived something rich, fun, and full of joy.
Heavenly Cool Whip Candy
Course: DessertDifficulty: Easy32
servings15
minutes5
hoursCool Whip Candy is a frozen, mousse-like chocolate treat dipped in a crisp chocolate shell. It’s simple, creamy, and delightfully fun to make perfect for both casual nibbling and gifting.
Ingredients
8 oz Cool Whip, thawed
24 oz (about 6 cups) milk chocolate chips
1½ tbsp vegetable shortening
Directions
- Line an 8-inch pan with parchment. Melt 14 oz chocolate chips in 30-sec intervals until smooth.
- Let cool slightly, then fold in thawed Cool Whip until fluffy. Spread in pan and freeze 1 hour.
- Cut into 16 squares, then into 32 triangles. Freeze 2 more hours until firm.
- Melt 10 oz chocolate chips with shortening. Dip each piece, let excess drip, and place on parchment. Freeze 2 hours.
- Serve straight from freezer for a crisp shell and creamy center.


